ESP32 DAC
Introduction to DAC
DAC (Digital to Analog Converter)
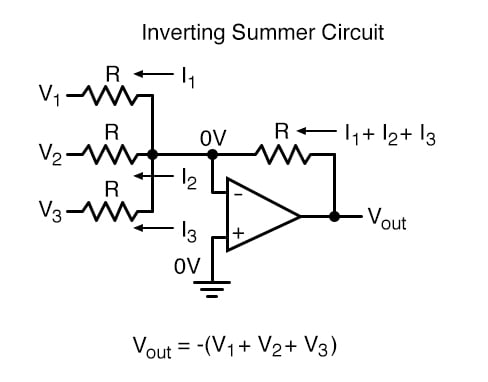
Introduction to Digital-Analog Conversion
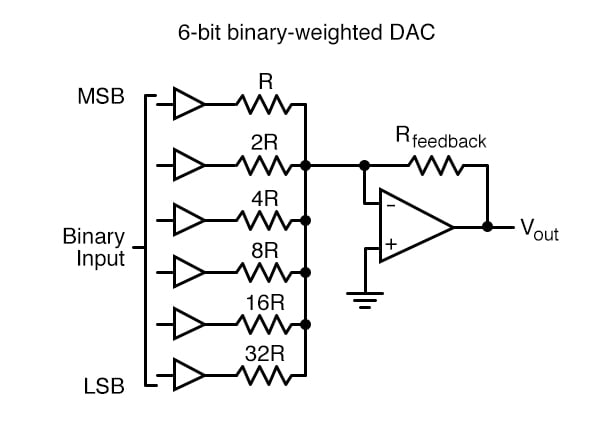
Binary-Weighted Resistor DAC
Sigma-Delta Digital Audio Converters (DAC)
Ref. 淺談 Delta-Sigma 之工作原理
Digital To Analog Converter (DAC)
ESP32 has two 8-bit DAC (digital to analog converter) channels, connected to GPIO25 (Channel 1) and GPIO26 (Channel 2).
The DAC channels can also be driven with DMA-style written sample data by the digital controller, via the I2S driver when using the “built-in DAC mode”.
For other analog output options, see the Sigma-delta Modulation module and the LED Control module. Both these modules produce high frequency PWM output, which can be hardware low-pass filtered in order to generate a lower frequency analog output.
Sigma-delta Modulation
ESP32 has a second-order sigma-delta modulation module. This driver configures the channels of the sigma-delta module.
There are 8 independent sigma-delta modulation channels identified with sigmadelta_channel_t. Each channel is capable to output the binary, hardware generated signal with the sigma-delta modulation.
- Prescaler of the sigma-delta generator -
sigmadelta_set_prescale() - Duty of the output signal -
sigmadelta_set_duty() - GPIO pin to output modulated signal -
sigmadelta_set_pin()
The range of the ‘duty’ input parameter of sigmadelta_set_duty() is from -128 to 127 (eight bit signed integer). If zero value is set, then the output signal’s duty will be about 50%, see description of sigmadelta_set_duty().
Also, it is recommended to use an active filter instead of a passive filter to gain better isolation and not lose too much voltage.
For example, you can take the following Sallen-Key topology Low Pass Filter as a reference.

Application Example:
Setting DAC channel 1 (GPIO25) voltage to approx 0.78 of VDD_A voltage (VDD * 200 / 255). For VDD_A 3.3V, this is 2.59V:
#include <driver/dac.h>

...

    dac_output_enable(DAC_CHANNEL_1);
    dac_output_voltage(DAC_CHANNEL_1, 200);
Examples>ESP32>AnalogOut>SigmaDelta

NodeMCU-32S pinout

Audio Amplifier: PAM8403
The PAM8403 is a 3W, class-D audio amplifier.
 |
 |
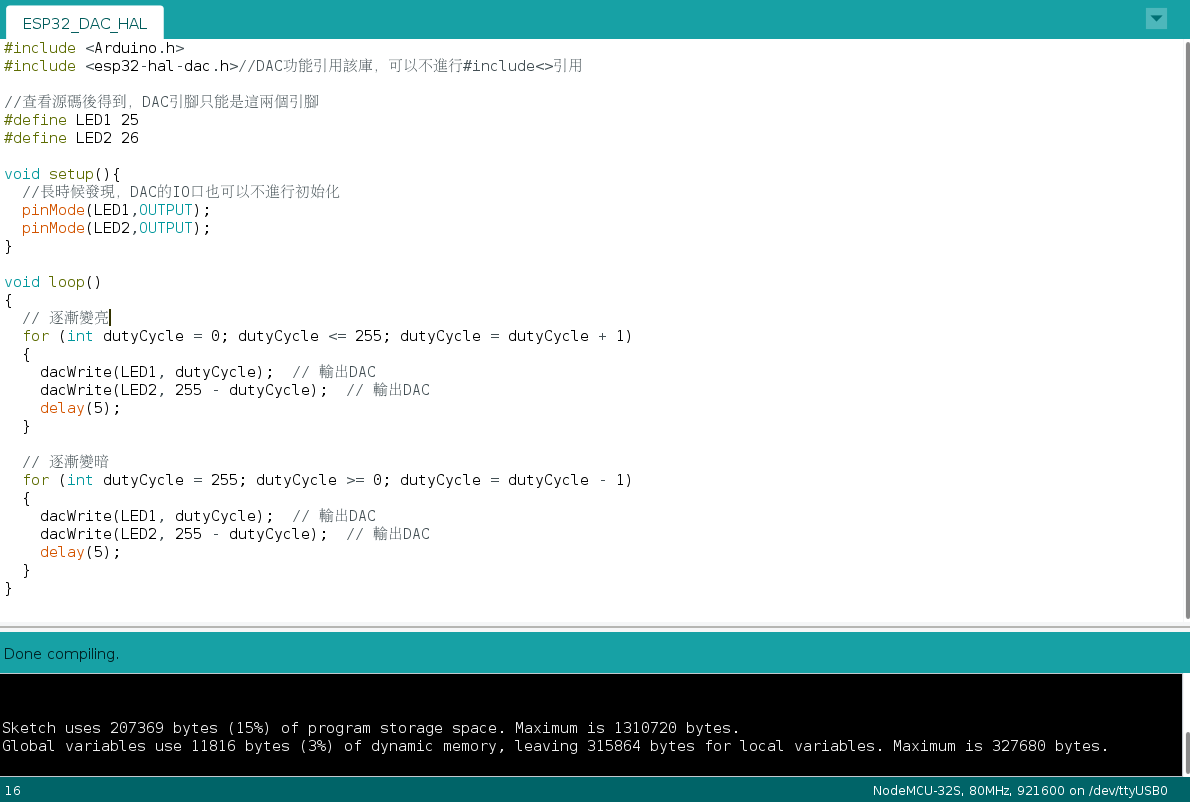
[Homework]: ESP32-DAC-HAL
- Create ESP32-DAC-HAL.ino
#include <Arduino.h>
#include <esp32-hal-dac.h>//DAC功能引用該庫,可以不進行#include<>引用

//查看源碼後得到,DAC引腳只能是這兩個引腳
#define LED1 25
#define LED2 26

void setup(){
  //長時候發現,DAC的IO口也可以不進行初始化
  pinMode(LED1,OUTPUT);
  pinMode(LED2,OUTPUT);
}

void loop()
{
  // 逐漸變亮
  for (int dutyCycle = 0; dutyCycle <= 255; dutyCycle = dutyCycle + 1)
  {
    dacWrite(LED1, dutyCycle);  // 輸出DAC
    dacWrite(LED2, 255 - dutyCycle);  // 輸出DAC
    delay(5);
  }

  // 逐漸變暗
  for (int dutyCycle = 255; dutyCycle >= 0; dutyCycle = dutyCycle - 1)
  {
    dacWrite(LED1, dutyCycle);  // 輸出DAC
    dacWrite(LED2, 255 - dutyCycle);  // 輸出DAC
    delay(5);
  }
}
-
Verify on ESP32 with LED1 on GPIO25, LED2 on GPIO26

-
Upload .ino to your github repository (https://www.github.com/yourname/arduino)
Sketchbook>ESP32_DAC_PlayWAV (ForceBeWithYou)


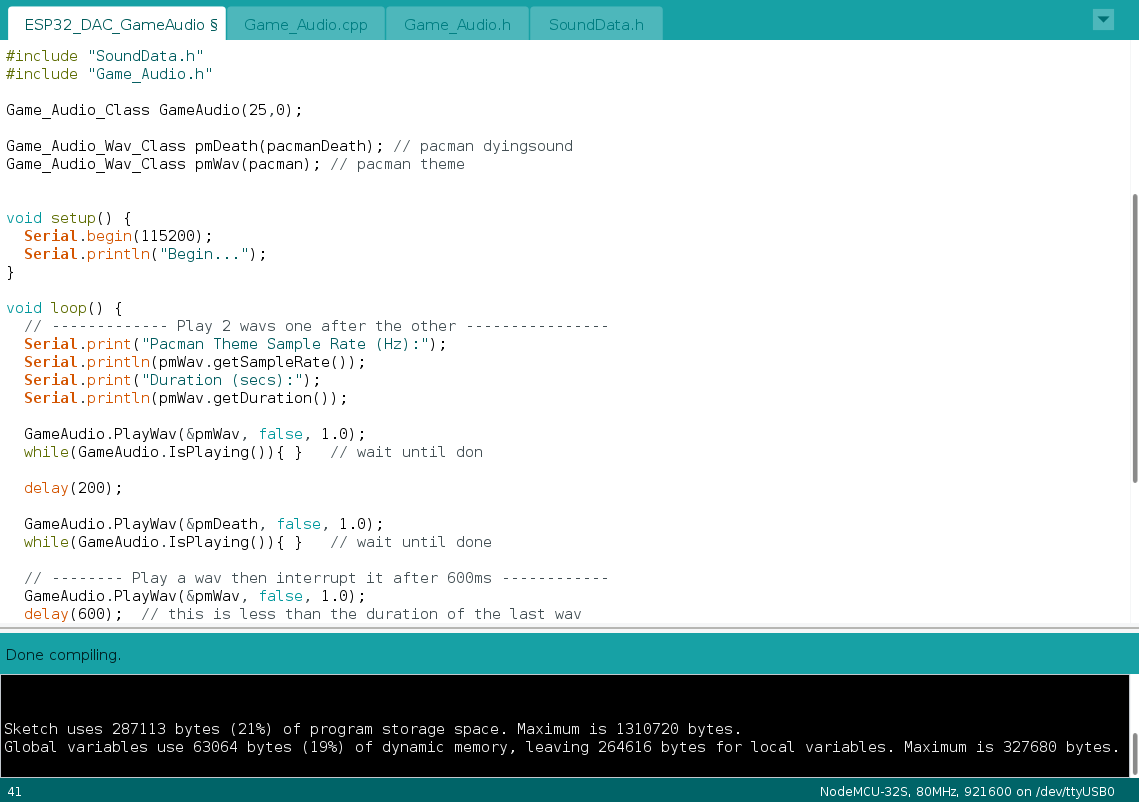
Sketchbook>ESP32_DAC_GameAudio (pacman)
Convert .mp3 to 8-bit mono .wav
- Use Audacity to open the sound file (.mp3)
- Select a part of track to cut

- Cut the selected

- Track>Mixer>convert stereo to mono (將立體聲分割成單聲道)

- Set Sample Rate to 8000Hz

- Export -> export to WAV

- Output to other uncompressed format

- save WAV Unsigned 8-bit PCM

- confirm to save into a .wav file

- exit Audacity

Convert .wav to hex file
xxd -i sound.wav sound.h
[Homework]: Convert a .mp3 sound/voice file to generate .h
- use Audacity to convert a sound.mp3 to generate sound.h
- copy sound.h to ~/Documents/Arduino/examples/ESP32_DAC_PlayWAV
- modify ESP32_DAC_PlayWAV.ino to use sound.h
This site was last updated June 18, 2023.